“Beautiful wooden boats are easy to find. The real story lies below the waterline.” These words were muttered to me by the inspector we’d hired to check out Sandavore before we bought her. He was slowly skittering sideways along the the keel of the boat, tapping lightly with a tiny (8 ounce!) peen hammer, listening. For what, I wasn’t sure at the time. Now I know.
As with every boat that sits continuously in the water, persistent and appropriate maintenance of the hull determines the condition of the hull. Saltwater teems with life that LOVES to find a place to set up home. Algae, seaweed, mussels, barnacles, eels, and worms consider every surface fair game. The area closest to the surface (waterline) will support life that requires photosynthesis and/or warm water. Further down barnacles are happy to find a place to await passing plankton upon which to feed. Mussels like crevices. Hull build-up increases parasitic drag, weakens wood, and allows salt water parasites like teredo worms to potentially bore into any weak area. There is no way to fully prevent these ecosystems from developing on a wooden hull- one can only delay the inevitable….
This is where maintenance comes in. Routine pressure washing, inspection, and bottom painting inhibits (but won’t fully stop) marine ecosystems from setting up shop. And guess what? It was that time again!
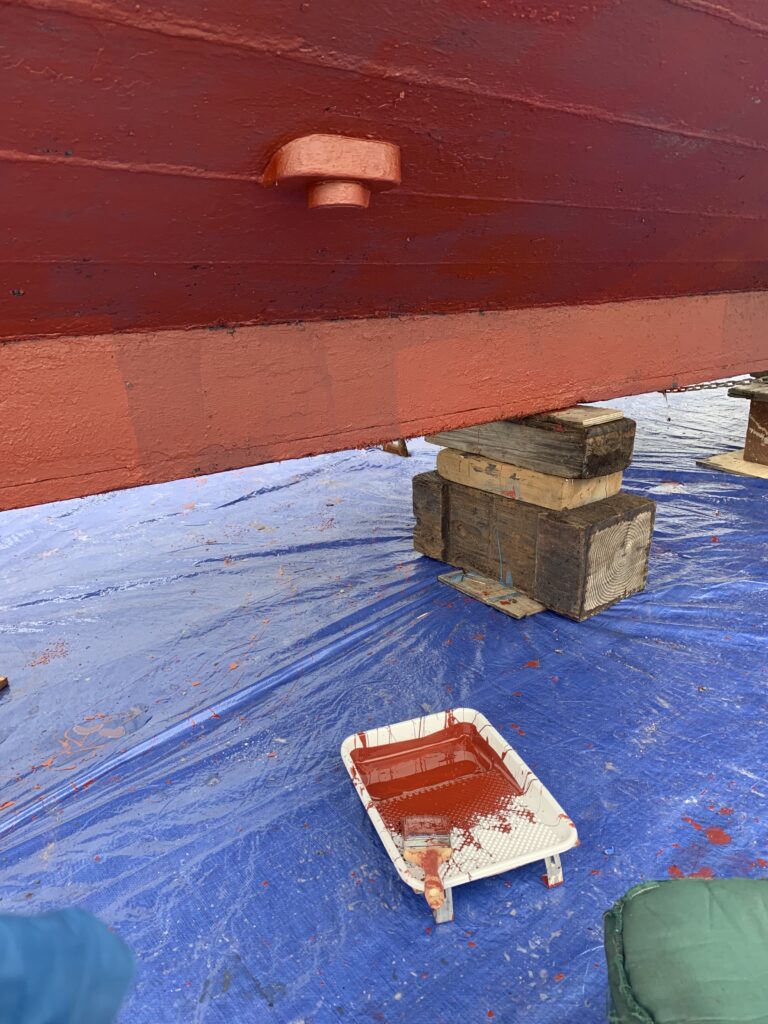
Bottom care is not artistic. I can best describe it as satisfying grunt work, sorta like whitewashing a fence. In addition to preparing the hull for bottom paint, the running gear and all zincs will need to be scrubbed clean, continuity checked, zincs replaced and the prop zinc-sprayed. Probably some waterline paint touch up work will be in order, too- I’ll discover upon haul out.
So what kind of bottom paint? Given the underwater battle that goes on, day in and day out, my answer is: as many coats as possible and as nasty as possible, according to environmental laws. Bottom paint is shockingly expensive. $300 per gallon for mid-range stuff is a great price. There are also a few different types, and without going into long-winded explanations I settled on a hard, ablative paint made by Petit marine coatings. I’ve bought enough for 2+ coats and will plan to use the remaining for areas that are hardest wearing (bottom of bug shoe, bow, and strakes at the waterline). Haul out appointment made with La Conner Maritime, here we come!
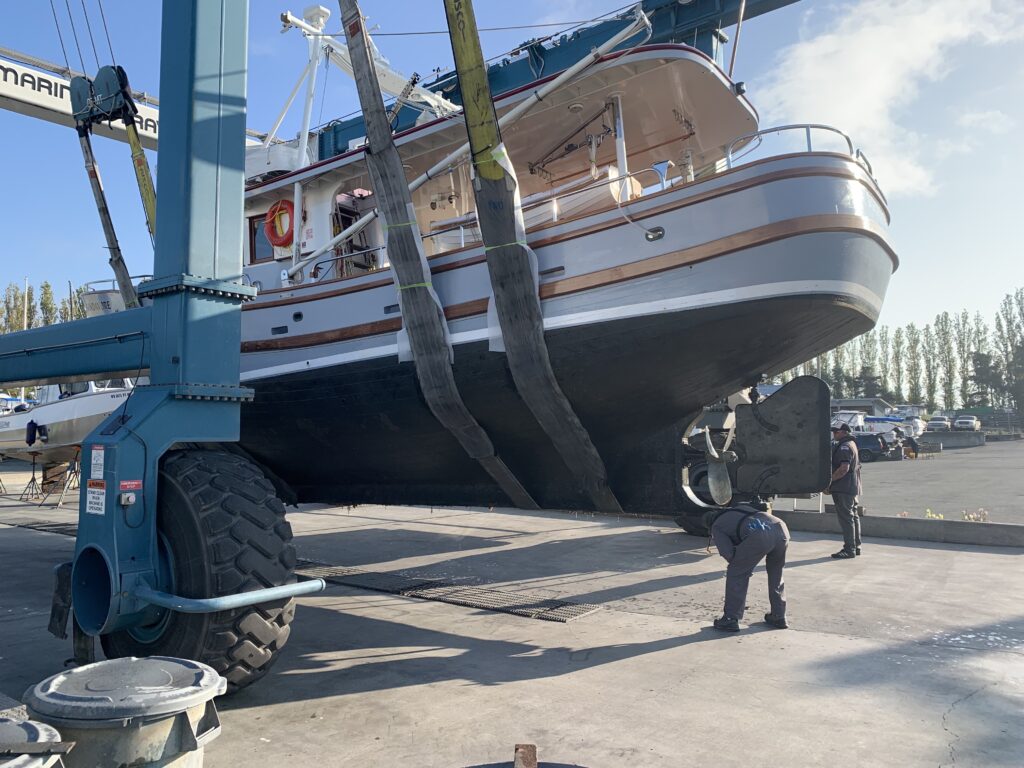
Upon haul out many things race through my mind: is there any obvious damage? Did the prop dome zinc stay on? Any prop dings? Nothing of that sort this time. Marco (in the foreground) is clearly the yard boss at La Conner Maritime, calm but immensely focused. He also trains up-and-comers to do this kind of work. Pressure washing a wooden boat is a delicate matter; keep 2500 psi in any one position for too long and it’s possible to cut right through the wood.
Upon completion they move to a permanent location in a process called “blocking”.
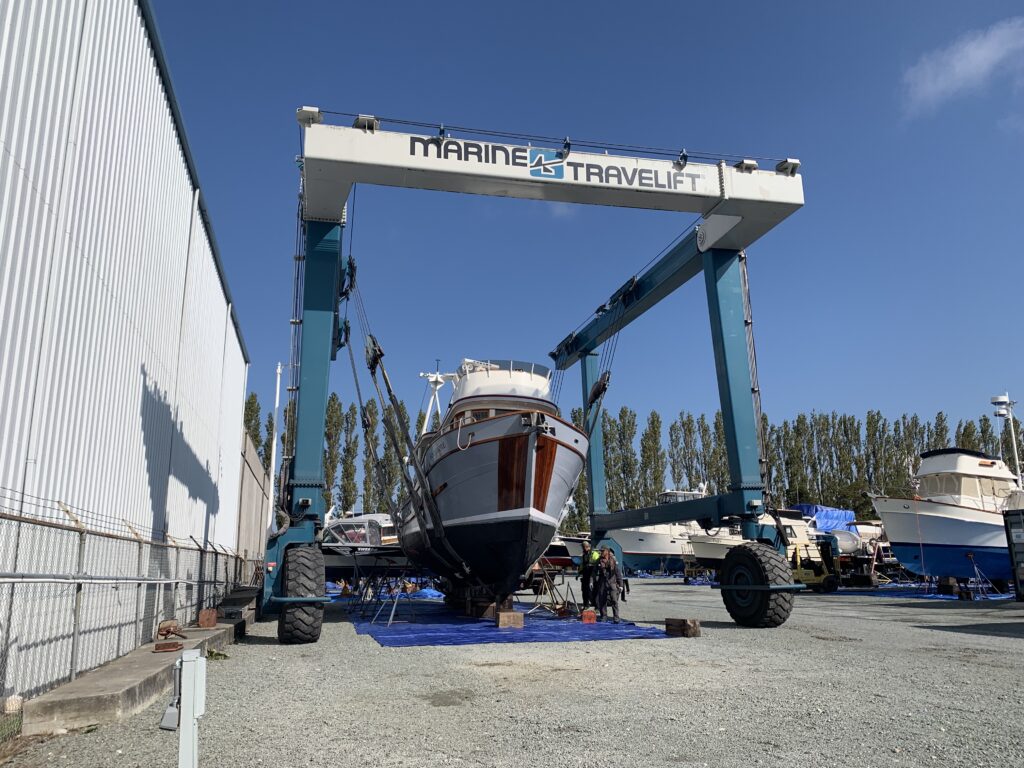
Once positioned, the fun began. I won’t go into all the sordid detail: it’s grunt work. Cleaning the waterline, taping the waterline, and then painting. But I will explain, dear reader, what it’s like to bottom paint a hull like Sandavore’s: take a four foot stick and attach a quart of milk on the end. Roll it in a tray, then in a crouched position, do a lunge forward and back under the hull. Repeat that about 300 times. Sometimes do it in a squatting position. Sometimes over your head as you roll along the waterline. But always that quart of milk is on the end of the stick. And what does that quart of milk represent? Why a roller full of highly concentrated copper bottom paint! 75% solids by weight, in fact. To take a break, I sat on a small stool at the rudder and hand painted the running gear. OH AND ONE MORE THING: gotta wear some protective gear! In my case a respirator with dual organic vapor cartridges, protective eye wear, and nitrile gloves.
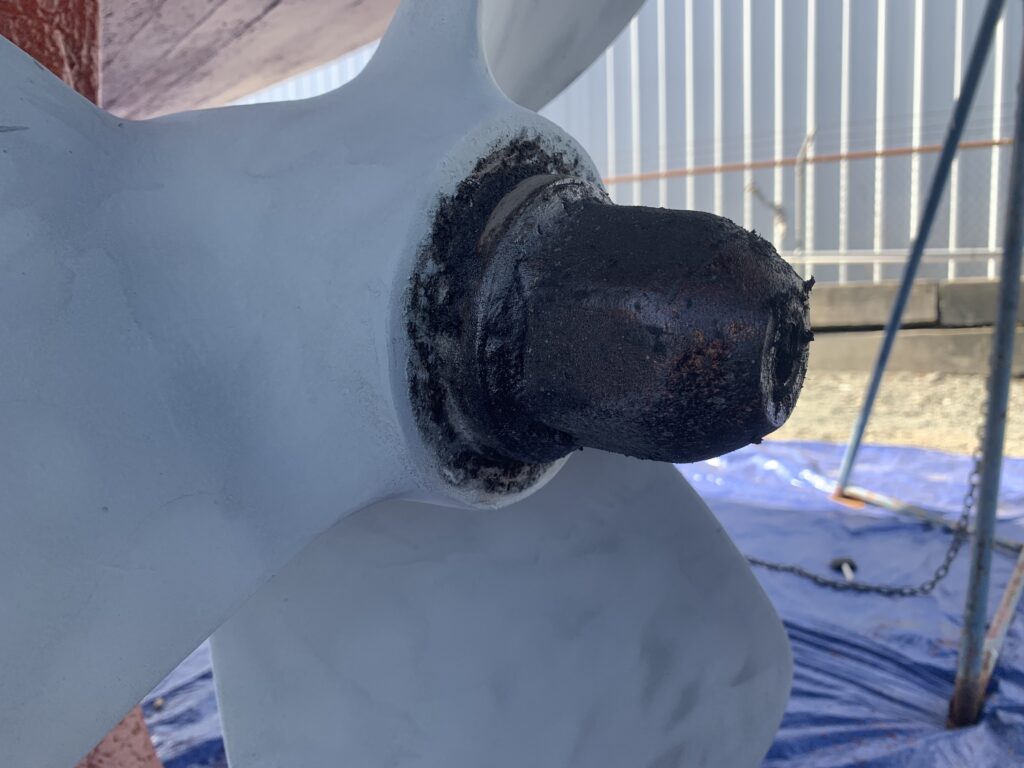
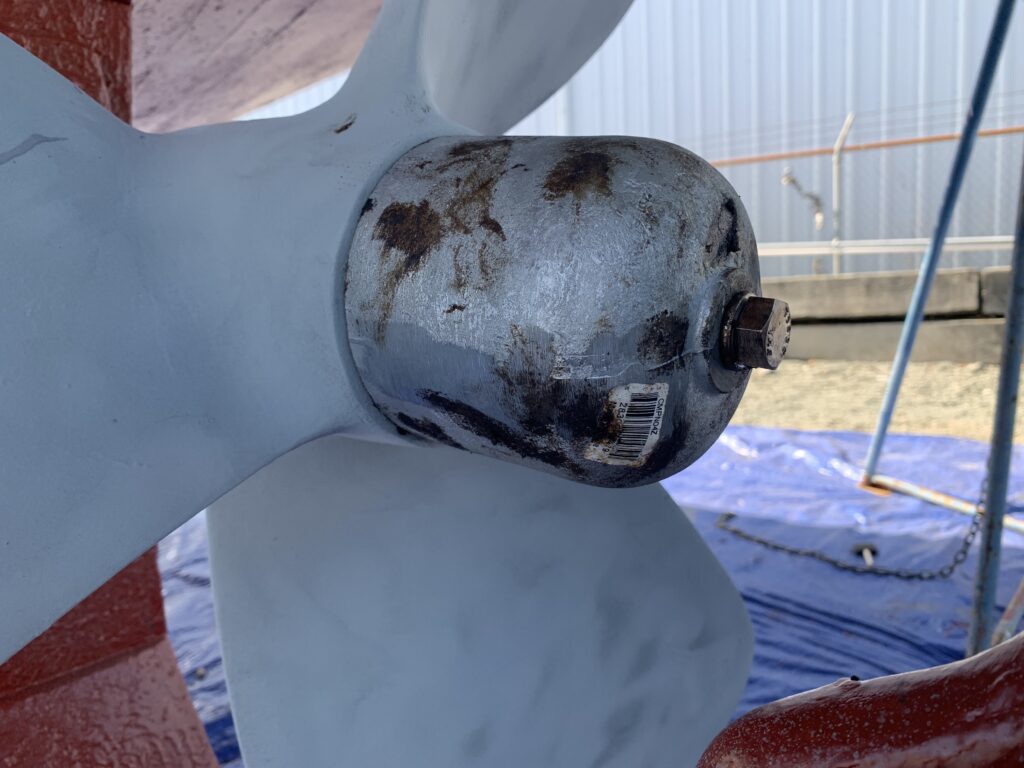
After two days, two coats, and some bow stem repainting it was time to address the zincs. Sandavore has four sets of zincs: the soft iron bow stem; the bow thruster shaft; the prop shaft; and the prop dome. All are important, but the prop dome is the most critical, IMO. Being a former fishing boat the prop is protected by a commercial grade zinc and it’s quite a thing. Weighing in at about 12 pounds it is designed to last a long time….but must be installed correctly.
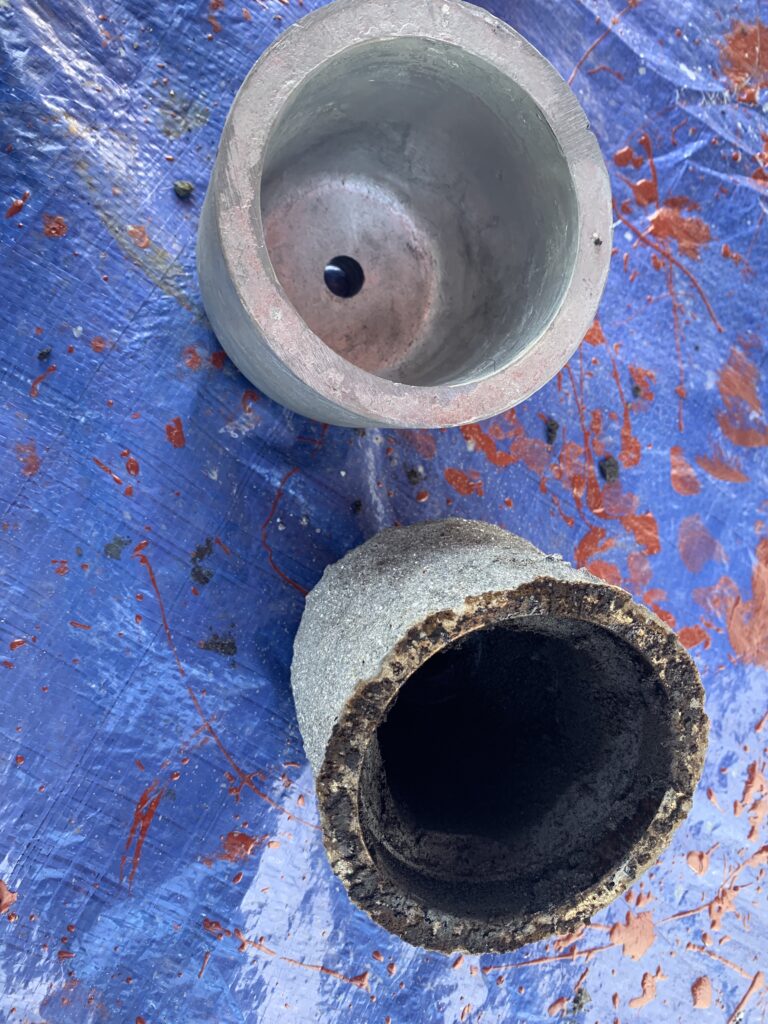
I had to learn the hard way about prop dome attachment. One Spring I popped the old dome off and just put a new one on. When I hauled out in the Autumn the dome was missing. “Did you tar and cement the dome?” Uhhhhhh…..
The physics of a zinc dome are that, as the dome shrinks in size, well, the dome shrinks in size and the bolt holding it gets loose! Duh. I felt like a fool. Props that are unprotected “pink”, which means that the zinc in the bronze leaches due to corrosion and electrolysis. Could have been a very costly mistake, but it appeared that the prop was naked for a short time. Old timers have many ways to retain prop domes; the way described to me was using roofing tar mixed with cement. The messy mixture is then spread inside the dome so that it fits snugly over the prop nut.
Day Four: Sandavore and my back were both ready to swing back into the water! Super grateful to Marco and his team for their diligent care and expert handling. Angus took care of several details and helped out with an additional gallon of bottom paint. We should be good for another 2+ years!